

Step 1: The Foundation – Prep Your Hair Like a Pro
The secret to a stunning blowout begins long before you even pick up your blow dryer. Proper preparation is the bedrock upon which a smooth, shiny, and long-lasting style is built. Think of it as preparing a canvas for a masterpiece – the better the prep, the more vibrant the final result.
First, let’s talk about washing. The frequency of washing your hair depends largely on your hair type. For instance, if you have fine hair, you might aim to wash it every 2 to 3 days to prevent oil buildup that can weigh down your style. Those with textured or curly hair, on the other hand, might find washing every 5 to 7 days is sufficient, helping to preserve natural oils. If your hair is colored, washing every other day or every 3 days can help maintain its vibrancy while still allowing for styling. Regardless of frequency, we highly recommend using a sulfate-free shampoo and conditioner. Sulfates can strip your hair of its natural oils, leading to dryness and frizz, which are the enemies of a good blowout. For a healthy foundation, it’s important to use nourishing products; you can find great blow drying hair tips and product recommendations from professionals.
After washing, gentle towel drying is crucial. There’s no need to damage your hair by going straight to the blow dryer with soaking wet strands. Vigorously rubbing your hair with a standard bath towel can cause friction, leading to frizz and breakage. Instead, gently squeeze excess moisture out of your hair with a microfiber towel or a soft 100% cotton towel. These materials are much gentler on the hair cuticle, helping to reduce drying time and minimize damage. Some even claim to reduce drying time by up to 50%, a significant time-saver in your routine.
Next, detangling. Your hair is most fragile when wet, so approach this step with care. Use a wide-tooth comb or a wet brush to gently work through any tangles, starting from the ends and moving upwards. Avoid using a regular bristle brush on wet hair, as this can cause split ends. If your hair is particularly prone to tangles, a detangling spray can make this process much smoother.
Finally, and perhaps most importantly for damage prevention, apply a heat protectant spray. Think of heat protectant as sunscreen for your hair; it creates a barrier that shields your strands from the intense heat of the blow dryer, preventing brittleness and dryness. Leave-in conditioners can also offer a layer of protection, especially for dry or split ends, but they shouldn’t be used as a sole heat barrier. Always layer a dedicated heat protectant over any leave-in products.
Choosing the Right Prep Products
Beyond heat protection, selecting the right styling products can significantly influence the outcome of your blowout.
- Volumizing Mousse: For those seeking extra lift and body, especially at the roots, a volumizing mousse applied to damp hair before drying can work wonders.
- Conditioning Straightening Balm: If your goal is sleek, smooth hair, a conditioning straightening balm can help tame frizz and provide a polished finish. Remember to apply balms and creams evenly throughout the hair, avoiding the scalp to prevent greasiness.
- Product Layering: The key is not to overdo it. A few sprays of a heat protectant, followed by a quarter-sized amount of your chosen styling product, is usually sufficient. Work products through your hair thoroughly to ensure even distribution.
The Ideal Dampness Level Before You Start
This is a critical,, step. You should never start blow-drying hair that is dripping wet. When hair absorbs water, it expands, making it more vulnerable to damage. Blasting hot air on swollen, wet hair causes rapid contraction of the cuticles, leading to brittle and rough hair.
Instead, your hair should be between 50% and 80% dry before you begin blow-drying with a brush. For medium-thick hair, aiming for 60-70% dry is ideal, while those with thick hair can start when their hair is about 50% dry. This initial air or towel drying significantly reduces the time your hair is exposed to direct heat, minimizing potential damage.
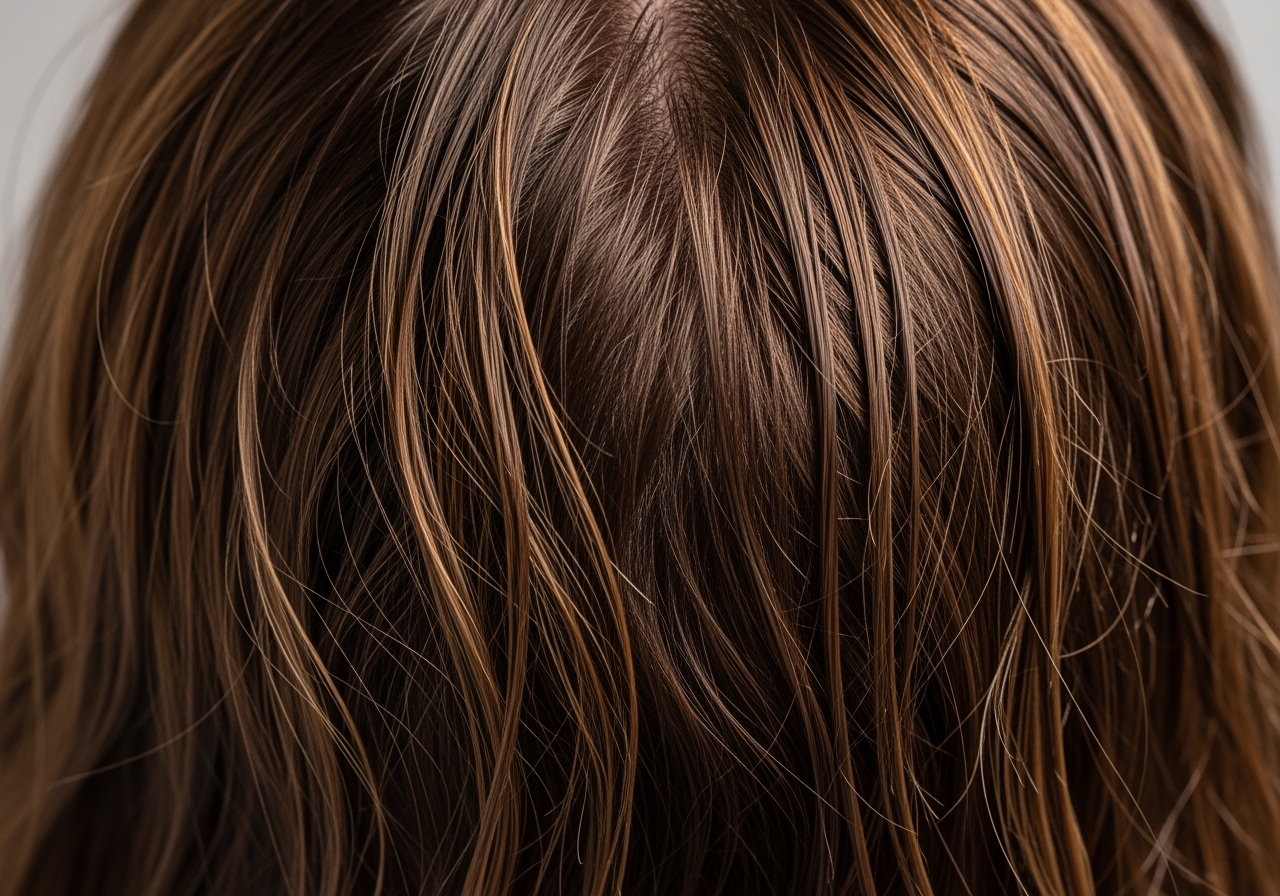
This pre-drying phase allows the hair cuticles to naturally close somewhat, making them less susceptible to heat damage and frizz. It also makes the styling process more efficient. If you have naturally curly or textured hair, you might find that starting your blow dry when your hair is slightly wetter (closer to 50% dry) works better for smoothing the cuticle and achieving a sleek finish.
Step 2: Master Your Tools for Flawless Blow Drying Hair
Just as a painter needs the right brushes, a stylist (even an at-home one!) needs the right tools. Your blow dryer and brushes are your primary instruments for creating that coveted salon-quality look. Investing in quality tools is not just about luxury; it’s about efficiency, hair health, and superior results.
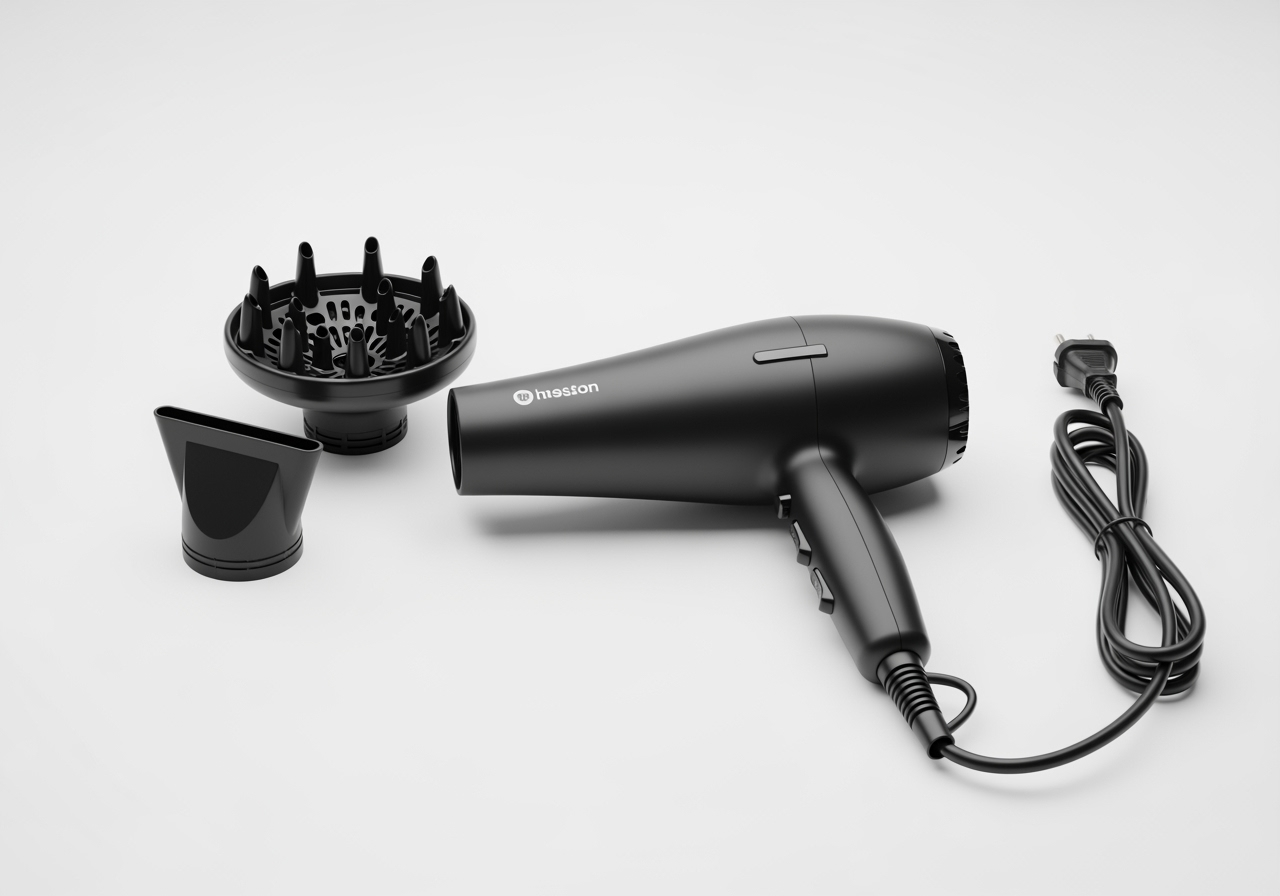
The quality of your blow dryer itself plays a significant role in the final result. Blow dryers typically come with a higher price tag for a reason: the material helps throw a load of negative ions, which reduces static and enables a smoother finish. Look for blow dryers with adjustable heat and speed settings. This allows you to customize the heat level based on your hair type and the stage of drying, preventing over-drying and damage.
- Ionic Technology: Many modern dryers feature ionic technology. These dryers emit negatively charged ions that break down water molecules faster, speeding up drying time and helping to seal the hair’s cuticle, resulting in shinier, less frizzy hair.
- Ceramic vs. Titanium: The material of your blow dryer’s heating elements matters.
- Ceramic dryers emit less harsh, more even heat, making them ideal for fine, damaged, or chemically treated hair. They help minimize damage.
- Titanium dryers heat up quickly and distribute heat evenly, making them excellent for thick, textured, and coarse hair, as they can handle higher temperatures efficiently.
- Wattage Guide: The wattage indicates the dryer’s power.
- Low Wattage (1,000-1,500W): Best for fine or short hair.
- Medium Wattage (1,500-1,800W): Suitable for curly or medium hair.
- High Wattage (over 1,800W): Ideal for thick or long hair, providing faster drying.
A good quality dryer, like those often seen in professional settings, can naturally produce smoother results and significantly speed up the process compared to a less expensive one.
The Importance of Nozzles and Attachments
Don’t ignore those attachments that came with your blow dryer! They are designed to optimize airflow and achieve specific styling goals.
- Concentrator Nozzle: This flat, narrow attachment is your best friend for a smooth, sleek blowout. It concentrates the airflow, allowing you to direct heat precisely onto the section of hair you’re working on. This precision helps to flatten the hair cuticle, minimizing frizz and maximizing shine. Always use the concentrator nozzle when aiming for a polished finish.
- Diffuser Attachment: If you have curly or wavy hair, a diffuser is essential. It disperses the airflow gently, preventing frizz and maintaining your natural curl pattern. It’s designed to dry curls without disturbing their shape, enhancing bounce and definition.
Knowing when to use each attachment is key. Use the concentrator for straight or wavy styles, and the diffuser for curly hair.
Selecting the Perfect Brush for Your Goal
The type of brush you use profoundly affects the outcome of your blowout.
- Round Brushes: These are indispensable for adding volume, creating soft curls, or achieving a bouncy finish.
- Boar Bristle vs. Metal/Ceramic: Boar bristles are excellent for smoothing and adding shine, distributing natural oils. Metal or ceramic round brushes heat up when exposed to the dryer’s airflow, acting like a curling iron to help hair hold its shape and add extra shine.
- Brush Size: The size of your round brush matters. Larger barrels create more volume and softer waves, while smaller barrels produce tighter curls and more defined bends.
- Paddle Brushes: For sleek, straight styles, a paddle brush is ideal. It provides excellent tension for smoothing hair from roots to ends without adding significant volume.
- Brush for Bangs: For styling bangs, a smaller round brush is often recommended. Some stylists even use a large metal brush, which acts as a curling tool, to pull bangs forward in a circular motion for volume.
The sections you work with should not be bigger than the tool you are using, ensuring even drying and styling. If a round brush causes breakage, it might be due to snagging on seams or poor construction. Look for brushes with solid bodies and smooth handles. For those concerned about breakage, a paddle brush can be a gentler alternative if volume isn’t the primary goal.
Step 3: The Technique – Sectioning, Tension, and Airflow
Now that your hair is prepped and your tools are ready, it’s time to master the actual blow-drying technique. This is where many at-home blowouts fall short compared to professional results. The key lies in methodical sectioning, precise airflow, and consistent tension.
Start by rough drying your hair. This means using your blow dryer without a brush, primarily focusing on the roots, until your hair is about 50-70% dry (as discussed in Step 1). For added volume, you can flip your head upside down during this stage. This initial rough dry helps to lift the roots and speeds up the overall process.
Once partially dry, it’s time to section your hair. This is a non-negotiable step for a salon-quality blowout. Trying to dry all your hair at once leads to uneven results, frizz, and frustration. Use hair clips to divide your hair into manageable sections. A common approach is to create two horizontal sections (top and bottom), then further divide the bottom section into two pigtails. The general rule of thumb is that the sections you work with should not be bigger than the brush you are using. This ensures that every strand receives adequate heat and tension.
Work from the bottom sections first, moving upwards. This allows you to control the drying process more effectively and prevents already-dried hair from getting re-wet.
Mastering Airflow and Tension for Smoothness
This is arguably the most crucial aspect of achieving a smooth, shiny, and frizz-free blowout.
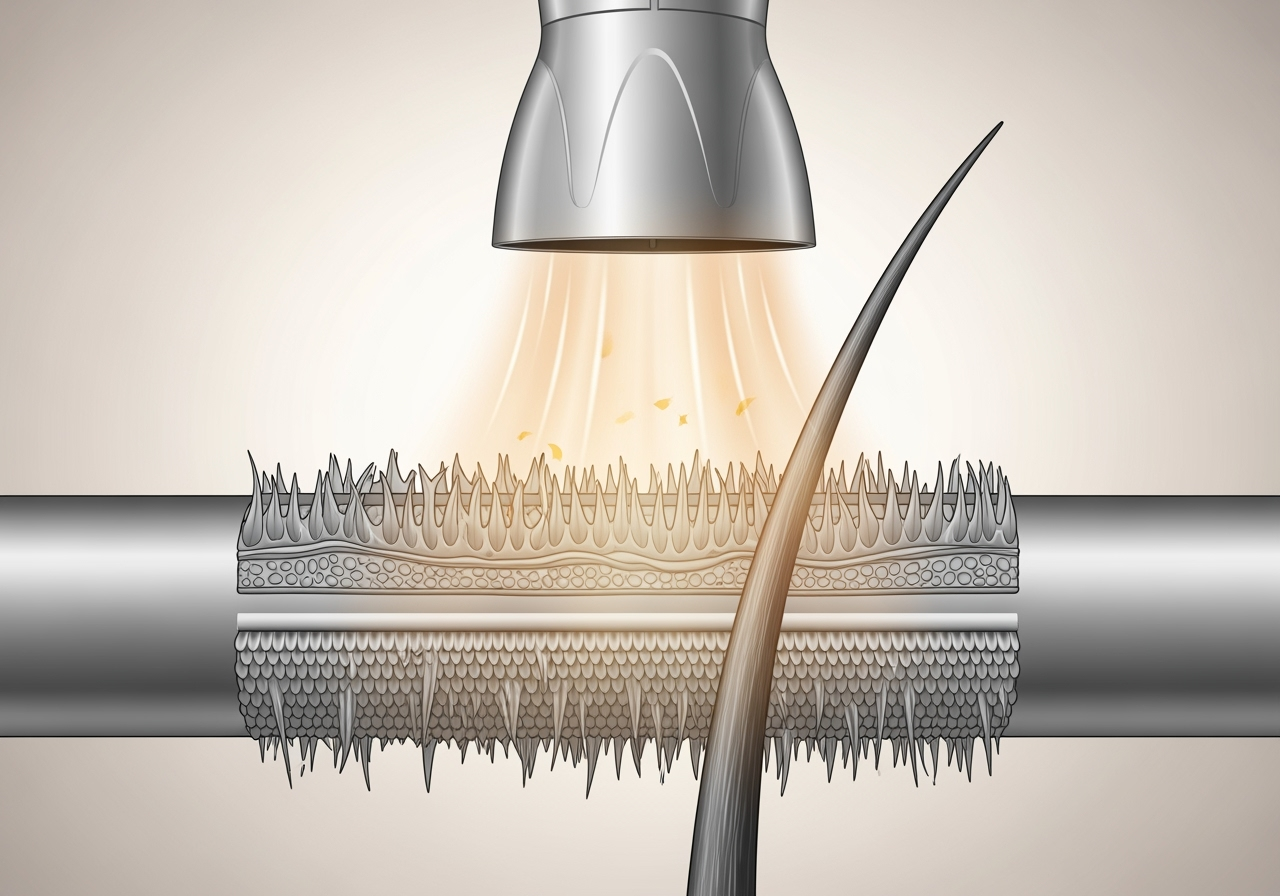
- Hair Cuticle: Your hair strands are covered in tiny, overlapping scales called cuticles. When these cuticles lie flat, hair appears smooth and shiny. When they are raised, hair looks dull and frizzy.
- Directing Airflow Downwards: Always point the nozzle attachment of your blow dryer downwards, following the direction of hair growth, from roots to ends. This helps to smooth down the hair cuticle, locking in shine and preventing frizz. Blowing air upwards or against the cuticle will rough it up, leading to a frizzy outcome.
- Creating Tension: While blow-drying, maintain consistent tension on the hair with your brush. Pulling the hair taut as you dry it helps to stretch and smooth the cuticle, resulting in that coveted sleek and shiny finish. This tension, combined with the downward airflow, is what truly sets a professional blowout apart. For instance, when drying the crown, roll the hair under and back using significant tension while pointing the blow dryer downwards and towards the back of your head. This technique ensures maximum smoothness and shine.
The heat molds the hair, and cold locks it. Use the heat to shape your hair, and then the cool shot (which we’ll discuss next) to set it.
A Special Focus on Bangs and Face-Framing Layers
Bangs and face-framing layers are often the first things people notice, so getting them right is essential.
- Drying Bangs First: Many stylists recommend starting with your bangs. Why? Because they are the most important part, and it’s best to do them at the beginning before your arms get tired, while you still have the patience, and before they get too dry and frizzy.
- Flat Wrap Technique: For bangs, a “flat wrap” technique can be effective. This involves using your forehead to help shape and bend the bangs. When bangs are almost dry, use a large metal brush and pull them forward in a circular motion for volume, allowing the metal brush to heat up and act as a curling tool.
- Styling Face-Framing Pieces: For face-framing layers, place your round brush over each layer and hold the dryer on it, pulling the hair away from your face for a soft, flattering sweep.
By carefully following these techniques for sectioning, airflow, and tension, you’ll be well on your way to achieving a professional-looking blowout at home.
Step 4: The Finishing Touches for Lasting Style
You’ve put in the effort to section, dry, and smooth your hair. Now, it’s time to ensure your beautiful blowout lasts and shines. The final steps are crucial for locking in your style, adding extra luster, and taming any last flyaways.
The cool shot feature on your blow dryer is not just a button for show; it’s a powerful tool for setting your style. After you’ve dried each section with warm or hot air, hit it with a blast of cool air. This rapidly cools the hair, closing the cuticle and locking in the shape you’ve created. As the old adage goes, “The heat molds the hair, cold locks it.” This step is essential for extending the longevity of your blowout and enhancing its shine. Professionals will also hit the hair with a cool shot to lock in the round brushed shape, a technique you can easily replicate at home.
Once your entire head is dry and cool-shot, it’s time for shine and polish.
- Shine Serum or Hair Oil: Run a small amount of shine serum or hair oil through your hair for a glossy, sleek look. These products add an extra layer of shine and help to smooth any remaining frizz. Work from the bottom of your hair up, focusing on the mid-lengths and ends, to avoid making your roots greasy.
- Taming Flyaways: Pesky flyaways and baby hairs can detract from an otherwise perfect blowout. Tame them with a tiny dab of styling cream or hair gel. Rub a small amount between your fingertips and gently pat it onto the stubborn hairs. For fine flyaways, spritz a clean spooly brush or even an old toothbrush with hairspray and gently comb it over the hairs in the direction you want them to sit.
- Hairspray: A light mist of hairspray can help hold your style in place without making it stiff or crunchy. Choose a flexible hold hairspray for natural movement.
These finishing touches not only improve the visual appeal of your blowout but also contribute to its durability, helping you enjoy your salon-worthy hair for days to come.
Step 5: Adapting Your Blowout for Different Hair Types and Lengths
One size does not fit all when it comes to blow drying. Your hair’s unique texture, density, and porosity significantly influence the best techniques and product choices for achieving optimal results. Understanding these nuances allows you to customize your blowout approach, maximizing its effectiveness and minimizing potential damage.
Techniques for Fine or Straight Hair
Fine hair often struggles with volume and can easily become limp or over-dried.
- Volume at the Roots: To add volume, ditch the nozzle during the rough-drying stage, flip your head upside down, and rough dry until your hair is 80% dry. This helps the hair cuticle to expand, creating more volume and texture. When using a round brush, focus on lifting the hair straight up and back at the roots, twirling the brush away from your face for maximum lift.
- Lighter Products: Opt for volumizing mousses or lightweight styling creams that won’t weigh down your delicate strands. Avoid heavy oils or balms near the roots.
- Lower Heat Settings: Fine hair is more susceptible to heat damage. Use lower heat settings and ensure you don’t over-dry. The heat level at this point is variable depending upon what works best for your hair, but generally, less heat is better for fine hair.
- Avoiding Over-Drying: Stop when your hair is just dry to the touch. Over-drying fine hair can make it brittle and prone to breakage.
Techniques for Thick or Coarse Hair
Thick or coarse hair can be challenging to dry thoroughly and often requires more power and attention to detail to achieve smoothness.
- Higher Wattage Dryer: A blow dryer with a higher wattage (1800W or more) will significantly cut down drying time for thick hair.
- More Sections: You may need 3 or more sections to fully dry your hair. Smaller, more manageable sections ensure that heat and airflow can penetrate every strand, leading to a more even and smooth finish.
- Boar Bristle Brush: A large round brush with natural boar bristles can provide excellent tension and help smooth the cuticle of thick, coarse hair, imparting a beautiful shine.
- Ensuring Hair is 100% Dry: Thick hair can feel dry on the outside but still retain moisture inside. Ensure each section is completely dry to prevent frizz from reappearing as soon as you step outside.
How to Approach Blow Drying Hair That’s Curly or Wavy
Curly and wavy hair types require a gentle approach to preserve their natural pattern and minimize frizz.
- Diffuser Attachment: This is your best friend. A diffuser disperses the air evenly, preventing the strong blast of air from disrupting your curl pattern and causing frizz.
- Preserving Curl Pattern: Apply a curl-defining cream or gel to damp hair before diffusing. Gently cup sections of hair in the diffuser bowl and lift towards the scalp.
- Anti-Frizz Products: Look for products specifically designed to combat humidity and frizz, which are common concerns for curly hair.
- Lower Speed Setting: Use a lower speed setting on your dryer to avoid blowing out your curls. The heat level can be adjusted based on your hair’s tolerance.
Best Practices for Blow Drying Hair of Different Lengths
Hair length also influences your technique and brush choice.
- Short Hair Techniques: For short hair, like a pixie or a blunt bob, a smaller round brush or even a flat brush can be used. For volume, lift sections at the root and direct airflow upwards. For a sleek bob, pull hair taut with a paddle brush, directing airflow downwards. You might even consider professional haircuts that are specifically designed to make at-home styling easier.
- Medium Length Styling: Medium-length hair offers versatility. You can achieve bouncy waves with a medium-sized round brush or a sleeker look with a paddle brush. Sectioning remains crucial.
- Long Hair Management: Long hair requires patience and thorough sectioning. Use a large round brush for volume or a paddle brush for a straight, smooth finish. Ensure you dry each section completely to prevent frizz and extend the life of your blowout.
- Damaged Hair Care: If you have damaged or dry hair (perhaps from chemical treatments or excessive heat styling), adapt your technique by using the lowest possible heat setting, prioritizing heat protectants, and ensuring your hair is well-conditioned beforehand. Consider incorporating regular hair treatment masks into your routine to replenish moisture and strength.
By understanding your hair’s unique characteristics and adapting your blow-drying technique accordingly, you can achieve results that truly complement your hair type and desired style. For personalized advice on colors that improve your blowout, consulting with a professional hair colorist can also be beneficial.
Frequently Asked Questions about Blow Drying Hair
Even with the best techniques, some common questions often arise about blow drying. Let’s address them to ensure you have all the information you need for a successful blowout.
How long can a properly executed blowout last?
A properly executed blowout can last anywhere from three to five days for most people. Several factors influence its longevity:
- Hair Type: Naturally straight or slightly wavy hair tends to hold a blowout longer than very curly or textured hair, which may revert to its natural pattern sooner, especially in humidity.
- Preparation and Technique: Thorough washing, proper product application (especially heat protectants and styling balms), and meticulous technique (sectioning, tension, downward airflow, cool shot) all contribute to a longer-lasting style.
- Environment: High humidity is the enemy of a blowout. It can cause hair to revert to its natural texture and frizz.
- Maintenance: To extend your blowout, avoid touching your hair excessively, sleep on a silk pillowcase to reduce friction, and use dry shampoo at the roots on non-wash days to absorb oil and refresh volume. A blowout can last anywhere from three to five days for most people.
Is it better to blow dry hair when it’s wet or damp?
It is unequivocally better to blow dry hair when it is damp, not soaking wet. As we discussed, your hair should be between 50% and 80% dry before you begin styling with a brush.
- Dangers of Drying Soaking Wet Hair: When hair is saturated with water, its structure is more vulnerable. Blasting intense heat onto dripping wet hair can cause the water inside the hair shaft to boil, leading to severe damage, brittleness, and breakage. This is sometimes referred to as “flash drying.”
- Fragility of Wet Hair: Wet hair is more elastic and prone to stretching and breaking. Applying high heat and tension to soaking wet hair increases the risk of damage.
- Reducing Drying Time: Pre-drying your hair with a microfiber towel or by air-drying significantly reduces the overall time your hair is exposed to heat, which is crucial for maintaining hair health.
Starting with damp hair allows for more controlled styling, minimizes heat exposure, and results in a smoother, healthier finish.
Why does my hair get frizzy after I blow dry it?
Frizz is a common frustration, but it’s usually a sign that the hair cuticle hasn’t been properly sealed. Here are the main reasons your hair might get frizzy after blow drying:
- Incorrect Airflow Direction: This is the most common culprit. If you blow air upwards or against the direction of your hair’s growth, you’re lifting the cuticle, leading to frizz. Always direct the airflow downwards, from roots to ends, to smooth the cuticle.
- Not Drying 100%: If your hair isn’t completely dry, especially at the roots or underneath layers, any remaining moisture will cause frizz as it dries naturally. Ensure every section is bone dry before moving on.
- High Humidity: Even a perfectly executed blowout can fall victim to high humidity. Moisture in the air can cause the hair cuticle to swell and lift, leading to frizz. Using anti-frizz products and finishing with a cool shot can help.
- Using the Wrong Products: Not using a heat protectant, or using products that are too heavy or too light for your hair type, can contribute to frizz. Ensure your products provide adequate moisture and humidity protection.
- Over-drying: Paradoxically, over-drying your hair can also cause frizz by stripping it of essential moisture, making it rough and prone to static. This is why it’s crucial to use the right heat settings and stop when your hair is just dry.
By paying attention to these details, you can significantly reduce frizz and enjoy a smooth, polished blowout. Our salon professionals are always ready to offer personalized advice and services, whether it’s for everyday styling or special occasions like wedding hair and makeup. You can also find a range of suitable products in our shop.
Conclusion: Your New Era of Perfect At-Home Blowouts
Achieving a salon-quality blowout at home might have seemed like an unattainable dream, but as we’ve explored, it’s entirely within your reach. By breaking down the process into five manageable steps, we’ve demystified the techniques that professionals use to create those enviable, shiny, and voluminous styles.
We started with Step 1: The Foundation – Prep Your Hair Like a Pro, emphasizing the importance of clean, conditioned, and gently towel-dried hair, along with the crucial role of heat protectants. Then, in Step 2: Master Your Tools for Flawless Blow Drying Hair, we highlighted how the right blow dryer and brushes can make all the difference in efficiency and results. Step 3: The Technique – Sectioning, Tension, and Airflow revealed the core of a great blowout, focusing on precise movements and the power of directing airflow downwards. We then covered Step 4: The Finishing Touches for Lasting Style, showing how a cool shot and the right finishing products seal the deal. Finally, in Step 5: Adapting Your Blowout for Different Hair Types and Lengths, we provided custom advice to ensure your technique works for your unique hair.
Mastering the art of blow drying is an empowering journey. It’s about gaining control over your hair, boosting your confidence, and enjoying consistent good hair days. Like any skill, it requires consistent practice. Don’t be discouraged if your first few attempts aren’t perfect. With each try, you’ll refine your technique, understand your hair better, and become more adept at wielding your tools.
Accept these healthy hair habits, invest in quality products and tools, and commit to the process. Soon, you’ll be able to create beautiful, long-lasting blowouts that rival those from any salon. Get ready to step out with hair that feels as amazing as it looks, every single day.